Vue学习2.0
自定义指令
自己封装的指令,可以封装一些dom操作
全局注册代码写到main.js里,局部注册写到当前组件内写
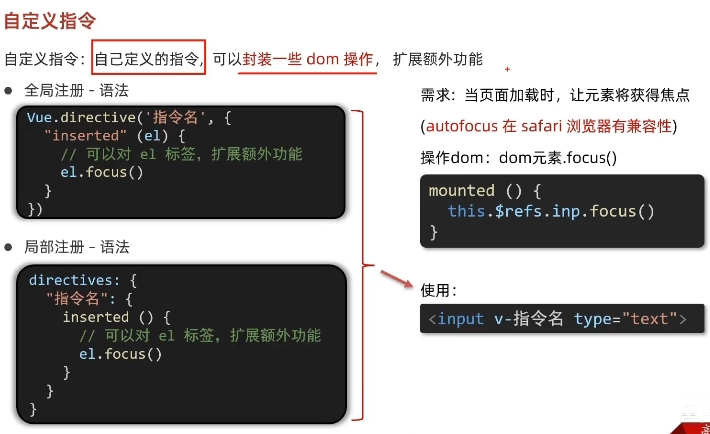
inserted:当标签插入页面是,立刻调用inserted内部的方法
el:当期控制的元素
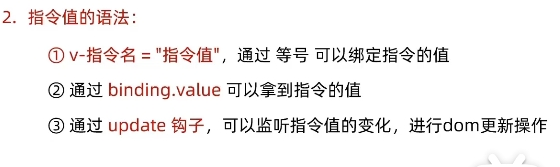
v-color案例(binding.value)
案例
<template>
  <div>
    <h1 v-color="color1">自定义指令测试1</h1>//红色
    <h1 v-color="color2">自定义指令测试2</h1>//蓝色
    <input type="text" v-model="color1">
  </div>
</template>

<script>
export default {
  data() {
    return {
      color1: 'red',
      color2: 'blue'
    }
  },
//自定义属性属性是,非响应式
  directives: {
    color: {
//inserted:元素刚加载时触发
      inserted(el, binding) {
        el.style.color = binding.value;
      },
//update,元素变化后触发
      update(el, binding) {
        el.style.color = binding.value;
      }
    }
  }
}
</script>
binding.value=v-color后面的值,比如red
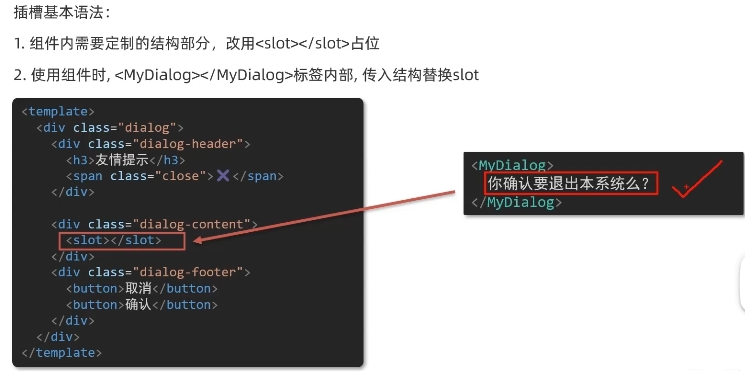
插槽(定制组件内容)
组件
<template>
  <div class="dialog">
    <div class="dialog-header">
      <h3>友情提示</h3>
      <span class="close">✖️</span>
    </div>

    <div class="dialog-content">
      <!-- 1. 在需要定制的位置,使用slot占位 -->
      <slot></slot>
    </div>
    <div class="dialog-footer">
      <button>取消</button>
      <button>确认</button>
    </div>
  </div>
</template>

App.vue
<template>
  <div>
    <!-- 2. 在使用组件时,组件标签内填入内容 -->
    <MyDialog>
      <div>你确认要删除么</div>//将要定制的内容传给组件
    </MyDialog>

    <MyDialog>
      <p>你确认要退出么</p>
    </MyDialog>
  </div>
</template>

<script>
import MyDialog from './components/MyDialog.vue'
export default {
  data () {
    return {

    }
  },
  components: {
    MyDialog
  }
}
</script>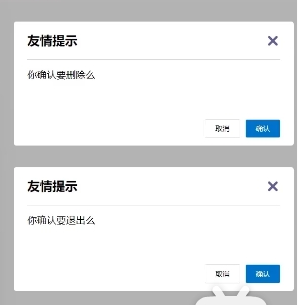
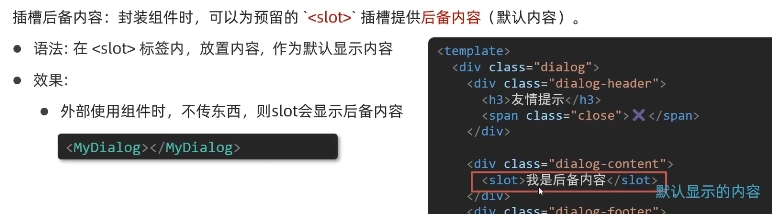
插槽的后备内容(默认内容)
具名插槽(多个插槽slot)
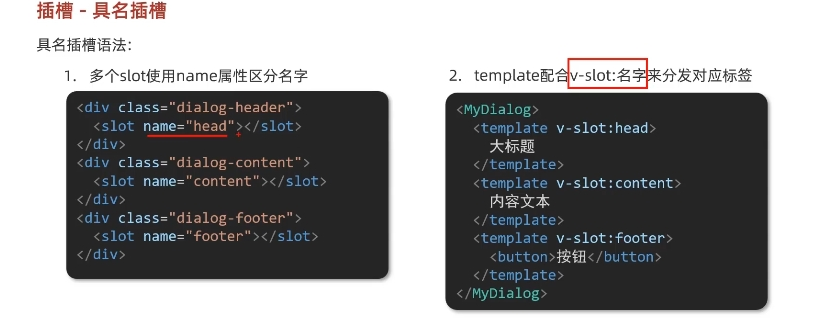
v-slot:可以简写为#
注意要用template包裹
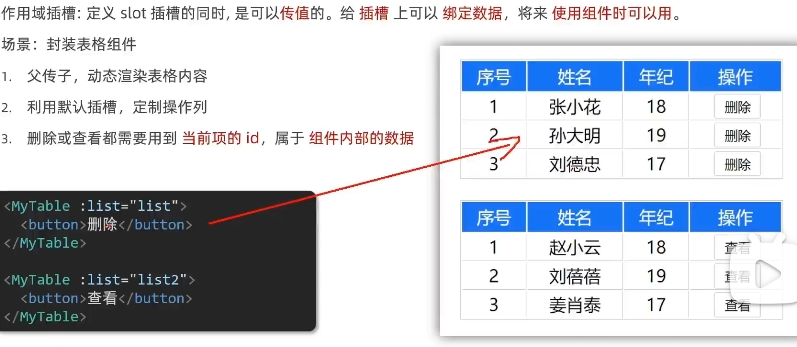
作用域插槽(插槽的传参语法)
代码
父组件
<template>
<div>
<MyTable :data="list">
<!-- 3. 通过template #插槽名="变量名" 接收 -->
<template #default="obj">
<button @click="del(obj.row.id)">
删除
</button>
</template>
</MyTable>
</div>
</template>
<script>
import MyTable from './components/MyTable.vue'
export default {
data () {
return {
list: [
{ id: 1, name: '张小花', age: 18 },
{ id: 2, name: '孙大明', age: 19 },
{ id: 3, name: '刘德忠', age: 17 },
]
}
},
methods: {
del(id) {
//删除数据
this.list = this.list.filter(item => item.id !== id)
}
},
components: {
MyTable
}
}
</script>
子组件
<template>
<table class="my-table">
<thead>
<tr>
<th>序号</th>
<th>姓名</th>
<th>年纪</th>
<th>操作</th>
</tr>
</thead>
<tbody>
<tr v-for="(item, index) in data" :key="item.id">
<td>{{ index + 1 }}</td>
<td>{{ item.name }}</td>
<td>{{ item.age }}</td>
<td>
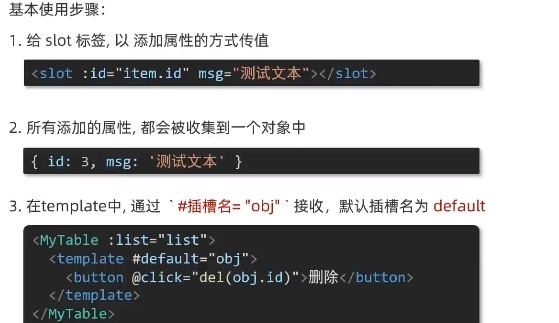
<!-- 1. 给slot标签,添加属性的方式传值 删除按钮,对应操作列-->
<slot :row="item" msg="测试文本"></slot>
</td>
</tr>
</tbody>
</table>
</template>
<script>
export default {
props: {
data: Array
}
}1.:data="list"父组件给子组件传list数组信息
2:props:子组件接受信息
<slot :row="item" msg="测试文本"></slot>子组件传递信息给父组件
 <template #default="obj">
        <button @click="del(obj.row.id)">
          删除
        </button>
      </template>
父组件接受子组件传递的信息#default="obj",穿过来的是一个对象,内容为
            {
               row: { id: 2, name: '孙大明', age: 19 },
               msg: '测试文本'
             }
button再插到slot里面,并且点击后,得到子组件传过来的id,再对应id删除数组list内的shu数据
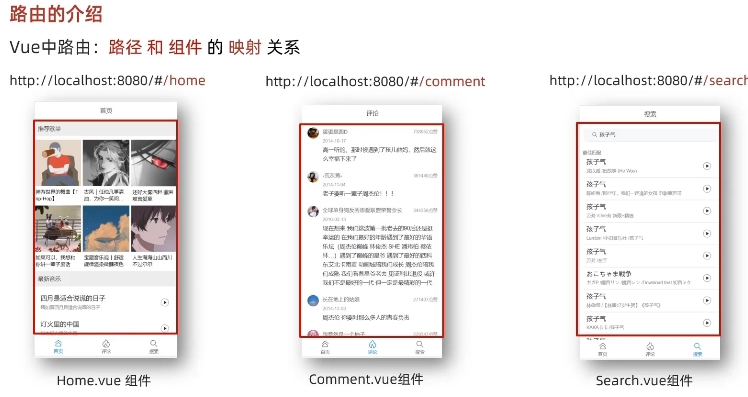
路由
什么路径匹配什么组件的关系叫做路由
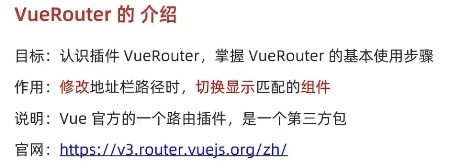
VUERouter插件
使用
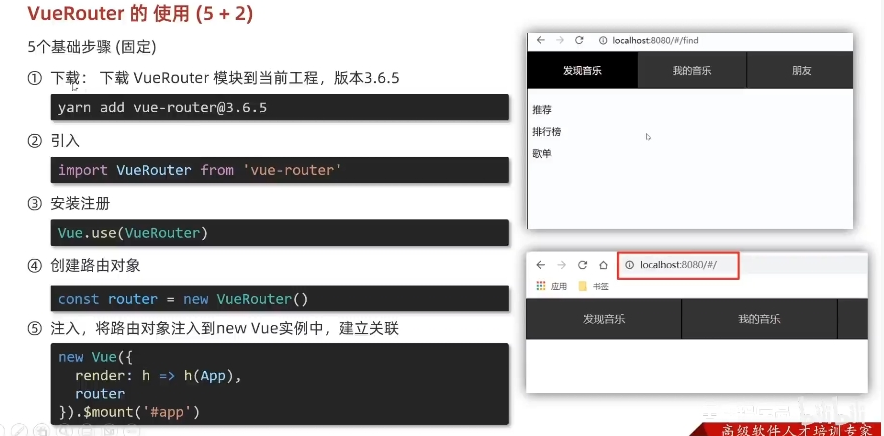
下载
初始化
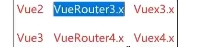
1.在控制台内输入npm add vue-router@3
2.创建一个为router的文件夹,在内创建一个为index.js的文件
//1.vueRouter初始化
import VueRouter from 'vue-router'
Vue.use(VueRouter) // VueRouter插件初始化

//3.配置vueRouter的路由规则
const router = new VueRouter({})

Vue.config.productionTip = false

new Vue({
  render: h => h(App),
   //2.把路由对象注入到Vue实例中
  router
}).$mount('#app')
在new VueRouter({})内配置路径规则

index.js代码
找文件可以@开始找
import Find from '../views/Find'
import My from '../views/My'
import Friend from '../views/Friend'

import VueRouter from 'vue-router'
import Vue form 'vue'
Vue.use(VueRouter) // VueRouter插件初始化

const router = new VueRouter({
  // routes 路由规则们
  // route  一条路由规则 { path: 路径, component: 组件 }
  routes: [
    { path: '/find', component: Find },
    { path: '/my', component: My },
    { path: '/friend', component: Friend },
  ]
})
main.js代码

使用
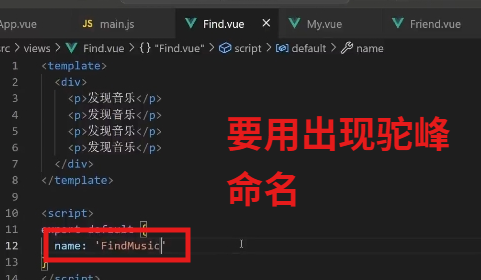
注意:在子组件内要取一个名字
App.vue内
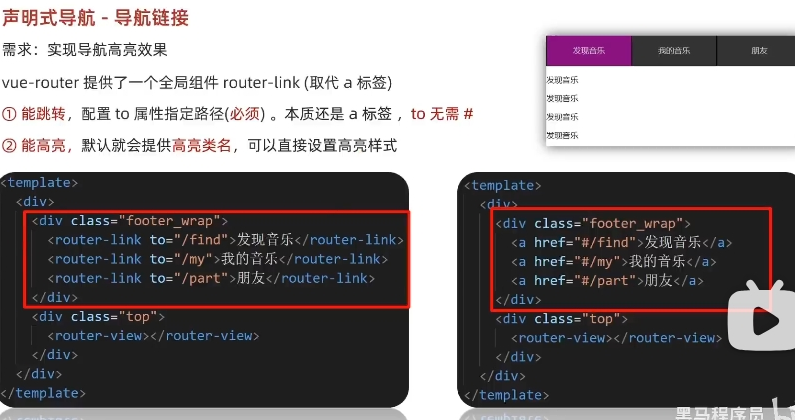
<template>
  <div>
    <div class="footer_wrap">
      <a href="#/find">发现音乐</a>
        #+path的内容
      <a href="#/my">我的音乐</a>
      <a href="#/friend">朋友</a>
    </div>
    <div class="top">
      <!-- 路由出口 → 匹配的组件所展示的位置 -->
      <router-view></router-view>
    </div>
  </div>
</template>
比如:点击”发现音乐“这个链接时,网址变为

此时就完成了路径的切换
  <div class="top">
      <!-- 路由出口 → 匹配的组件所展示的位置 -->
      <router-view></router-view>
在这个盒子内就会展示发现音乐这个子组件的内容
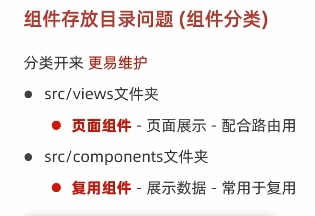
views与components
router-link语法
当点击链接标签时,会自动添加一个router-link-active的类名
只需要在css里添加a.router-link-active就可以控制被点击的标签的样式

主要用在二级路由
模糊匹配:只要是一级路由开头开头就会被修改样式
精确匹配:只有完整的二级路由名才能被修改相应的样式
自定义类名
const router = new VueRouter({
  // routes 路由规则们
  // route  一条路由规则 { path: 路径, component: 组件 }
  routes: [
    { path: '/find', component: Find },
    { path: '/my', component: My },
    { path: '/friend', component: Friend },
  ],
  // link自定义高亮类名
  linkActiveClass: 'active', // 配置模糊匹配的类名
  linkExactActiveClass: 'exact-active' // 配置精确匹配的类名
})
.footer_wrap a.active {
background-color: purple;
}跳转传参(路由之间的通信)
固定参数
语法

如果两个路由之间要传递参数,输出方
 <div class="hot-link">
      热门搜索:
      <router-link to="/search?key=黑马程序员">黑马程序员</router-link>
      <router-link to="/search?key=前端培训">前端培训</router-link>
      <router-link to="/search?key=如何成为前端大牛">如何成为前端大牛</router-link>
    </div>
  </div>
接受方
在非脚本区域
<p>搜索关键字: {{ $route.query.key }} </p>脚本区域
console.log(this.$route.query.key);接收方渲染
动态参数
语法
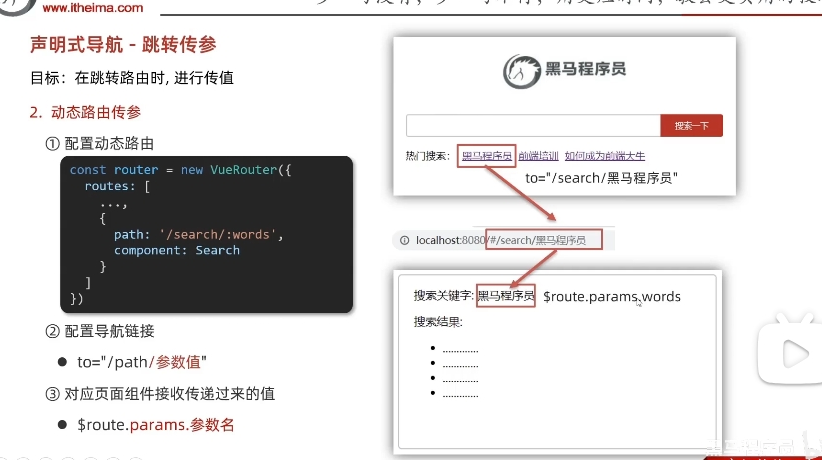
router规则要更改
const router = new VueRouter({
  routes: [
    { path: '/home', component: Home },
    { path: '/search/:words', component: Search }
  ]
})
输出方
 <div class="hot-link">
      热门搜索:
      <router-link to="/search/黑马程序员">黑马程序员</router-link>
      <router-link to="/search/前端培训">前端培训</router-link>
      <router-link to="/search/如何成为前端大牛">如何成为前端大牛</router-link>
    </div>
  </div>
接受方
脚本区
<p>搜索关键字: {{ $route.params.words }} </p>非脚本区
console.log(this.$route.params.words);可选符
const router = new VueRouter({
  routes: [
    { path: '/home', component: Home },
    { path: '/search/:words?', component: Search }
  ]
})
当router对象为这样时,如果输出没有赋予参数,接收方也可以正常渲染
 <div class="hot-link">
      热门搜索:
      <router-link to="/search">黑马程序员</router-link>
      <router-link to="/search/前端培训">前端培训</router-link>
      <router-link to="/search/如何成为前端大牛">如何成为前端大牛</router-link>
    </div>
  </div>
<router-link to="/search">黑马程序员</router-link>没有传参,那么接收方渲染